This article was first published in Norwegian on www.hooked.no 02.01.14.
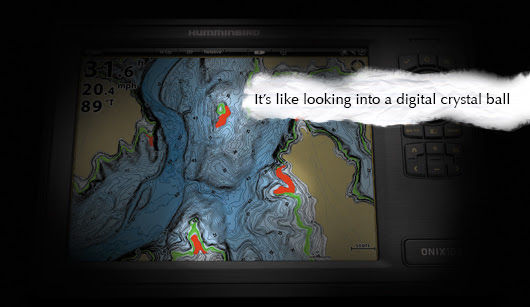
It is always nice to see that the companies we buy our toys from invest time and money in developing these toys, and kudos to Navico, because they have made a toy that is both simple to use and will without doubt enrich our fishing and give us more fish in the boat.
If you don't care about reading a long and detailed article, then don't worry. I will give you the conclusion right away, since that seems to be what IG is doing. IG is a very good tool for making your own depthcharts, without having to spend the time figuring out how the more complicated alternative mapping software works, and without having to spend time manually drawing the outline of your lake(s). So if you have a compatible unit in your boat, is willing to spend 99 USD a year, and want a solution for making decent charts fast and simply, then this is the service for you.
General information
IG is what you call a cloud service, unlike software that has to be installed on your PC. Instead you upload your sonar logs to the IG-webserver, and let it generate your map for you. The only thing that has to be installed on your PC is a small program that does the uploading. You can buy IG through Insight Store. In the Insight Store you may also purchase other products from Navico, like the Insight Planner (software for managing and planning trips and waypoints) and various maps for Lowrance, Simrad and B&G units.
Overview of functions and pricing
IG is available in two versions, one is free of charge and one is 99 USD a year. The free version gives you functions like watching your sonarlogs with a Sonarviewer (replaying your log, almost like it looked on your unit), viewing depths in the sonarlog and a few other services.
 |
| Insight Genesis Features |
But it's the 99 USD version that gives you the really good stuff. It will let you merge different sonarlogs into one big log, and then convert it to a map. The map can be viewed on your PC, and downloaded to a memorycard. Once the map is on a memorycard, it can be used in the compatible Lowrance/ Simrad/ B&G unit in your boat. Hopefully a future update will make IG compatible with Apple as well.
IG is owned by Navico, who also owns Lowrance, Simrad and B&G. It should therefore come as no surprise that IG can only be used on units from those three brands. If we look at the models that are compatible, it's roughly Simrad NSS, the latest Lowrance Elite (4,5 and 7 HDI), Lowrance HDS Gen 2 and Lowrance HDS Touch. Your unit must also have the latest software, this is easy to upgrade and you find the latest software for your unit HERE. On the website HERE you will find a complete list of compatible units.
It is worth mentioning that you may use other units for logging the necessary data out on the water. During this test I used data from my own units, HDS 8 Gen 1 and a HDS 5 Gen 2. Just to test it, I also tried to upload sonarlogs from an aging Lowrance LMS, and that worked like a charm as well. The finished map will only display on one of the units listed as compatible though, the finished map has a form of softwarekey embedded that requires a key only found in these units. The reason for this, is primarily to prevent users of IG from selling their finished maps. You may however register up to four units with your IG account, as long as they are compatible, so it should be enough for most users.
How to collect the necessary sonarlogs?
In order for IG (or any other mapping-software) to produce your map, you need data that contain depth and position. In the world of Navico, this is called a sonarlog and it's basically a long list of depths and waypoints recorded from your boats electronics. In order to record these sonarlogs, you need a combo-unit (fishfinder and chartplotter in one unit) or one fishfinder and one chartplotter linked through ethernet. (Grey cable with yellow plugs.) An example of this sort of network could be one HDS 5m and one HDS 5x connected through ethernet, the sonarlog would then be saved on a memorycard in the HDS 5m.
IG has three options for different maps, and since these maps also have different demands when it comes to the quality of your sonarlog, IG will not produce maps if you run your boat above certain speeds:
- Bottom Composition - 6 mph/ 5,2 knots
- Vegetation - 12 mph/ 10,4 knots
- Depth contours - 20 mph/ 17,4 knots
How was this test performed?
I bought a license as usual on the Insight Store webpage. Next I registered my Lowrance HDS 5 Gen 2, uploaded about 200 sonarlogs, edited the finished map and saved it to an 8GB SD-memorycard so I could use the map in my HDS.
Buying the license itself was a smooth and easy operation, and required a credit card and my email address. An email confirming my purchase came immediately after. For the next step you need to register the unit(s) you intend to use the finished map in, in my case a Lowrance HDS 5 Gen 2. For the registration you need your units serialnumber and Content ID. If you don't have the latest software in your unit, you might not see the Content ID line as in the screenshots below. You CAN NOT use a map from IG in a unit unless you register this information. Unfortunately this also means that you can not share your IG map across units through ethernet.
 |
| Serialnumber and Content ID HDS Gen 2 |
The next step is to download the program used to upload your sonarlogs to IG, the Genesis Upload Tool.
With the program in place, you are now ready to upload your sonarlogs. Double-click on the Upload Tool, this will bring up the menu below.
 |
| Screenshot of the Upload Tool |
Click on "Select files" and search your way to where you have saved your sonarlogs. (They will be in a format that ends with .sl2 or .slg) When the sonarlogs are located, you may mark them as private by marking off in the "Keep Private" box (red ring). "Keep Private" means that you don't allow Navico to use your sonarlogs or their content, they will be for your eyes only. I missed a "Select All" function for this when uploading all the 187 sonarlogs that I used for this test, but when one just wants to upload the sonarlogs from the last fishing trip, ticking of a few boxes is pretty fast.
Press "Upload" and pour yourself a cup of coffee while the program takes care of the uploading. For each sonarlog that is uploaded you will receive an email to the emailadress you registered earlier, so there is no need to sit and watch the screen on your PC. DON'T close the program or disconnect your internet connection until the program has finished uploading. A green "V" is shown at each sonarlog as it is finished uploading, and when all files are finished, the "Upload Complete" message will appear. (Green circle.) DO NOT disconnect your internet connection or turn off your PC while it's uploading, as this will interrupt the process and you will have to start over.
In the screenshot above, all of my 187 files for this test where uploaded correctly. It's worth mentioning that the message only has meaning to the upload itself, it does not say anything about the quality of your sonarlogs. You can review each log in IG when the upload is completed.
With your files uploaded, you can view them by accessing the dashboard in IG, or by following the link in one of the emails you received. If you access through IG, click on "Insight Genesis" and then "Dashboard". The Dashboard gives you an overview of all the lakes you have uploaded sonarlogs for:
 |
| Dashboard |
"My Uploads" (purple circle) displays the lakes you have uploaded logs for. "Merged Uploads" (green circle) displays sonarlogs already merged and "Promo Uploads" (red circle) displays merged uploads by the ProTeam. The "Promo Uploads" can be used by yourself as examples until you have enough sonarlogs to make tour own map. Unfortunately the list of lakes in this section is a bit short, but it will probably grow as more lakes are covered.
By clicking on one of the lakes under "My Uploads" the next menu pops up. This is a more detailed overview of the different sonarlogs covering this body of water:
 |
| List of sonarlogs |
To the far left in the list (black circle) you may press the symbol of a map to get a very rough idea of where in the lake the log was recorded. To the right (red circle) you will find the date and time of the recording, and to the far right (green circle) the "View Trip" lets you view each sonarlog in detail:
 |
| Viewing a sonarlog |
"Data Offset" (black circle) gives you the option to adjust the depth in your log. This can be very handy if you fish in a reservoir or lake with drastic changes in waterlevel, since you can adjust your logs according to the waterlevel. A small tip from me is to try to pass over the same point each time you go out to log data, use a point at the dock or a buoy, as this will be your point of reference for adjusting sonarlogs. IG can be used in saltwater in quite a few countries, and "Data offset" allows you to use data from a tidal station to automatically adjust your map for the tide at the time of your recording. Not all countries allow for private mapping of their coastal waters, but this is a work in progress by Navico, so hopefully IG will be compatible with all coastal waters in due time.
A request on my own behalf would be for IG to adjust it's "Data offset"-function so it accepts inland waterlevel-stations as well. As an example, in Norway many inland lakes and rivers have such stations where the waterlevel is measured continuously, and the data is available online. This is probably not a small quest for the R&D department at Navico, but it would make IG even simpler to use, and the quality of our maps even better.
"Map Generation" (green circle) is used if you want to make a map of just the single sonarlog you are viewing. but we will get back to generating maps later on, you want to merge all your sonarlogs from that particular lake before making your finished map.
Let's take a look at "Merge Trips" (red circle in the screenshot above). This function takes you to this menu:
 |
| Merge Trips |
"Merge Trips" shows a list of all the sonarlogs you have uploaded that covers this lake. The point now is to merge or combine all these logs into one big log, and this big log will be the basis for your map. With the "Select All" (black circle) you can select all your logs with one click. "Track Buffer" (green circle) is a brand new function in IG, and it lets you decide how far between tracks IG should let it be before it refuses to calculate the depth between the tracks. If put in simple terms, a big buffer means a "pretty" map covering a lot of your lake, while a small buffer gives better accuracy but covers a smaller area. I almost always use the maximum (100 meters), but I keep in mind while using the map that it might have some inaccuracies in areas where my sonarlogs are few and far apart.
With "Merge Trips" (red circle) you merge all sonarlogs previously selected, with the buffer of your choice.
It might take a while for IG to merge your sonarlogs and do the calculations in order to make your map. How long this takes depends on the sheer number of sonarlogs, and the length of each log. You will receive an email when the process is finished, so there is no reason to stare at your screen while waiting. Perhaps you should pour yourself that second cup of coffee instead?
When the email pops up in your inbox, it's time to take a look at what your finished map looks like on your PC:
 |
| All merged |
In the Dashboard, click on "Merged Uploads" (green circle) and the lake you wish to view. "View Trip" (red circle) brings you here:
 |
| Merged sonarlogs, zoomed out. |
You may zoom in and out to study the map, or you can go straight to generating the map for your Lowrance/ Simrad/ B&G unit with "Map Generation" (green circle). The maps available come in three different forms, all including depth:
- Contours only
A normal map of depths with contours
- Vegetation
Depths with vegetation areas marked in green
- Bottom Composition
Depths with a colored background indicating hard or soft bottom
Let`s take a closer look at the Contours Only option:
 |
| Zoomed inn |
Contours only is a normal depthchart with contours showing areas of the same depth. You can see the contours on the other versions of maps as well, but then with bottom composition or vegetation belts in addition. Keep in mind the limitations on boat speed I mentioned earlier, in order to have the option of viewing bottom composition and vegetation you need to be going slow, just a nod or two above trollingspeed.
For those of us used to metric units, it's also worth noting that the map on your PC only displays depths in feet, not in meters. Hopefully this will be corrected in the next update, but on your Lowrance HDS or Simrad NSS the depth can be displayed in whatever unit you are used to. In the Elite-series of models, IG maps can only be viewed in feet at the moment. Navico has assured me that they are working on an update for the Elites that will solve this.
After viewing your map on the PC, the next step is "Map Generation" (black circle). This will take you to this menu:
 |
| Map Generation |
Start off by selecting your "Target Device" (black circle) where you will find the unit(s) you registered with serialnumber and content ID at the start of this article. "Include Layer" (red circle) lets you choose between the different maps we just looked at, contours only, bottom composition or vegetation. "Contour Interval" is used to decide witch intervals you want between the contours; 1, 3 etc feet.
When you have made your choices, click on "Generate Map" and wait a few seconds (or a minute or two if the map is huge like mine) and you are ready to save your map:
 |
| Click Save! |
As the text says, click "Save" (black circle) and choose where you want to save your file. You can save it directly to a memorycard or to your PC for later use. It's a good idea to name the file and give it a date so you can tell your finished maps apart as your collection of maps grow. The finished file looks like this:
 |
| Almost done now... |
With the file saved, double-click it and it will unwrap itself. Do not change the names on any of the smaller files that are unpacked from the .exe-file.
Now the time has come to put the memorycard in your unit and yourself and your boat on the water. Below are a series of screenshots from my Lowrance HDS 5 Gen 2, showing how my finished maps look like. As you can see I haven't finished mapping all of this lake (it's a huge one), but even so the map is giving me great info for my boating, and my fishing. The screenshots are gradually zooming in on my boat. Depths are in meters, range in nautical miles:
 |
| Zoomed out |
 |
| Getting there |
 |
| Now it gets interesting |
 |
| Area with a lot of different depths |
 |
| Zoomed all the way in |
The last screenshot is zoomed all the way in, there is a scale in the lower right corner. You can see that my boat is positioned directly on top of a contour claiming it's 26,5 meters deep, while my sonar says it's 25,4 meters deep. A chart with high quality and plentiful sonarlogs will be extremely accurate. If you continue to record sonarlogs on your unit, and upload them to IG, the map will become more accurate for each sonarlog you add. So keep on logging that data, even though your map already covers your lake. I have my Lowrance HDS recording every time I use my boat, and every time I upload these sonarlogs my map gets even better.
A few more screenshots showing the map in it's intended environment:
 |
| Slightly imprecise, good thing I'm recording. |
 |
| Almost 34 knots, but I have a good map and clear view. |
Come spring I plan to do some tests comparing maps from IG, Navionics and Reefmaster. So far I can see no differences in the depth on maps from IG and Reefmaster, and both are endlessly better then Navionics on the lakes I fish, as long as you have enough sonarlogs. The only issue I see in the IG-maps are in the quality of the automatic drawing of the outline of the lakes, islands rocks etc. Rocks that just brake the surface, or even small islands are not always recognized by IG as solid land. Who knows what the future will bring, Navionics might be catching up though, their "Community Layer" allowing customers to add their own data might tighten the gap? Now matter what happens, I believe IG is here to stay, and will continue to be a useful tool for boaters and fishermen.
As a final conclusion, I'll repeat what I wrote at the beginning: IG is a very good tool for making your own depthcharts, without having to spend the time figuring out how the more complicated alternative mapping software works, and without having to spend time manually drawing the outline of your lake(s). So if you have a compatible unit in your boat, is willing to spend 99 USD a year, and want a solution for making decent charts fast and simply, then this is the service for you.


.JPG)
.JPG)
.JPG)
.JPG)
.JPG)
.JPG)
.JPG)
.JPG)
.JPG)
.JPG)
.JPG)
.JPG)
.JPG)